DIY Pallet Christmas Tree and Presents
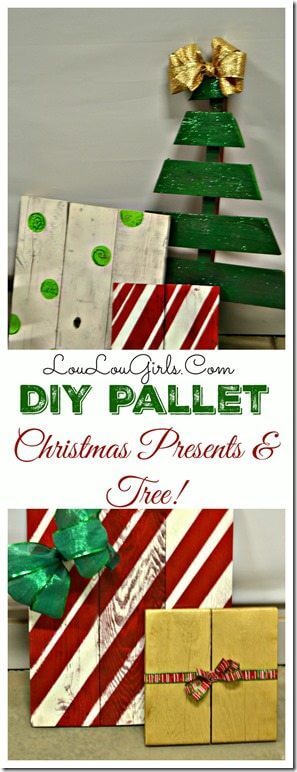
DIY Pallet Christmas Tree and Presents! This is such a fun and cheap project to make! I was in desperate need of a girls night, so my I locked my kids in the house with my hubby and the girls and I got to work in the garage making our DIY Pallet Christmas Tree and Presents!
Last month I made this Rustic Pumpkin Stand, and after I realized how easy it is to make things with power tools, I had to show my friends that they could do it too!
DIY Pallet Christmas Tree and Presents
Here’s what you’ll need…
Old Pallet boards
Spray Paint
Nail Gun
Sander
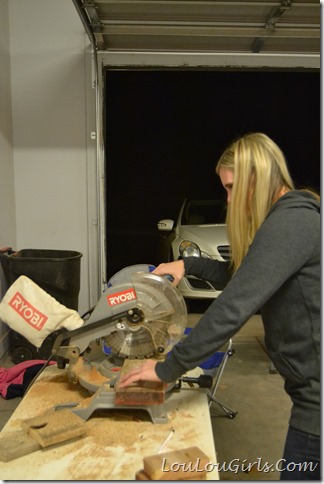
Miter Saw
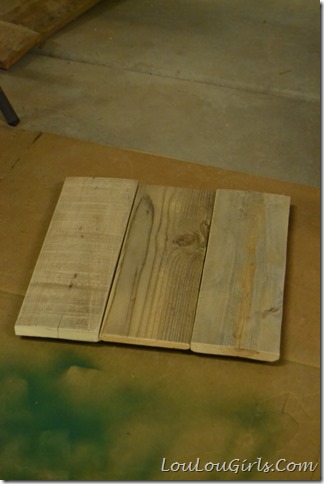
Start by cutting 2 or 3 boards the same size. It doesn’t matter how big or small they are, I did 2 different sized presents.
Now sand your boards down.
Once again, this is up to you. It doesn’t have to be perfect. The more rustic the better. Decide what side looks the best, and flip your boards face down on your table. These 3 boards will be your present.
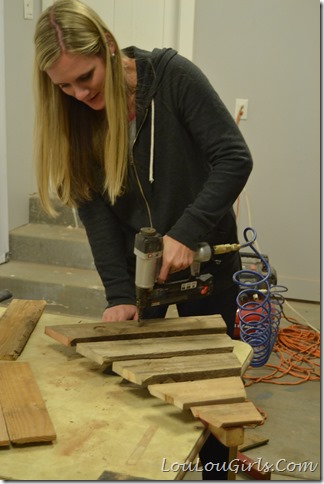
Now cut 2 boards that are a little smaller than your present. You’re going to use these to nail to the back of the present and secure it. The boards should almost be as long as the present. Nail them in!
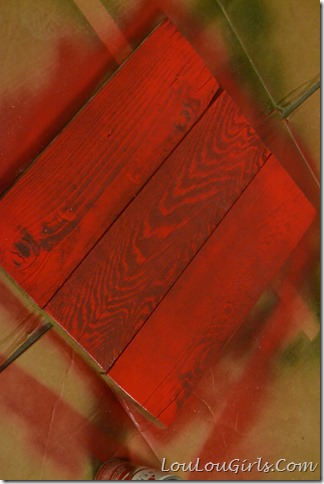
Now you have to decide what color to paint your present. We used spray paint in green, gold, red, and white for ours. Then we added stripes and dots with craft paint once the spray paint was dry.
I used painters tape to paint candy stripe on my present. Then I painted white over the top.
Then we made bows with ribbon and nailed them into the presents! Some of us used glitter paint on the top of the paint! I loved it! They are super cute!
Okay, now to the trees. You’ll need a jigsaw for this craft.
Start with one skinny piece of wood. I used a piece of railing from an old deck, cause I’m thrifty like that.
Nail boards about 1 inch apart on the skinny board. I feel bad because I didn’t get a picture of this, but after you’ve nailed the boards on, use the jigsaw to angle cut the boards to look like a tree. We traced the tree shape first then cut away. Now sand your tree down.
Spray paint it! I used green on the top, and gold on the bottom of my tree. Super easy!
Add a bow, or a star to the top now!
This project was almost free for me because I already had spray paint, wood, and ribbon. I bet you have a lot of these things too! Nothing’s better than a fun, almost free craft!







 Your Closest CHEERLEADERS!
 We are your big sisters , cheerleaders , and confidence boosters in building a happy home. We are the Lou Lou Girls!


You always make the coolest things! I so want to do these!
Thanks Alexis! That's sure nice of you! This is so easy, you should totally give it a try and send us pictures when you're done!
This is a great idea! I love the tree 🙂
Thanks Lisa!
This is the BEST idea! I love all of them…I was just reading today that flat Christmas trees were on trend this holiday season! 🙂 Thanks for linking to Monday Funday~xo
Thanks! I always love finding out that I'm on trend, even when I didn't know it! Haha!
These all look fantastic!
Thanks Miranda!
I've been working on some christmas trees too, but never thought of the presents! You did a super cute job on ALL OF IT! 🙂 Thanks for linking up. Pinning to the highlight board!
Thanks Kammy! I also saw some cute pallet snowflakes that I want to try next! Just add them to list, right?!
These are seriously cute- I might have to make my hubby whip me up a few of these for my yard. Thanks for sharing!
Thanks!
LOVE these – so stink'n adorable! Pinning to share and refer back to because I think my house needs some of these.
Thanks Marie! Your house totally needs these!
So stinkin cute! Shared on Facebook and pinned! Thank you for sharing at Merry Monday this week.
Thanks Amanda!
These are so cute, I love them! I've seen Christmas trees made from pallets but not the presents. Adorable! Thanks for sharing. Pinning!
Yeah, after I posted this I saw a cute pallet Christmas tree that they added lights to. The possibilities are endless! Thank you!
Hi there
Just stopped by to let you know that I featured this on my Saturday Spotlight post this week!
Saturday Spotlight
Thanks again for linking up! Hope you have a great weekend!
Jill @ Creating my way to Success
How exciting! Thanks so much Jill!
The pallet presents are adorable! I have a stack of wood pallets in my garage just looking for the right inspiration. Thanks for the idea! Can't wait to make them.
Thanks Jane and Sonja!
This is fabulous! Love the end result. Thank you so much for sharing it with us at Turn It Up Tuesday!! I also host a creative party called The Creative Corner Link Up that goes live every Sunday night at 6pm PST! Hope we can see you there also. xx
Very cool project – love it thanks for stopping by Pin worthy Wednesday
Those trees are really cool! Thanks for sharing with us at Two Uses Tuesday, and happy Thanksgiving!
Hugs,
Pili
Jessica, these are adorable! I love the rustic feel of them. And I am so impressed with your prowess with the power tools! We have all of these, but I've never used them. I don't know why. I used to work in a furniture factory and handled much bigger tools, that was a whole lotta years ago! You've given me the push to want to try! Happy Holidays!
Yay! Do it Nikki! It's so fun, and the possibilities are endless!
What a fantastic Christmas craft! Thank you so much for sharing this post with us at the Hearth and Soul Hop. Hope to 'see' you again this week!
Cute idea! Thanks for sharing at Home Sweet Home!
Hello!! Just stopping by to let you know that your post has been selected as a Feature over at the Welcome Home Wednesdays Link Party! Come on over and see your link and grab a Featured Button as well!
Love these cool pallet decorations! What fun it must have been to create them and especially now to display them!
Thanks for joining Grace at Home. I'm featuring you this week!
I agree with the others, these are adorable. Maybe I missed it in the instructions, but how do you stand your tree up? Is the piece of wood that the tree is attached to used as a stake? Or did you build a stand?