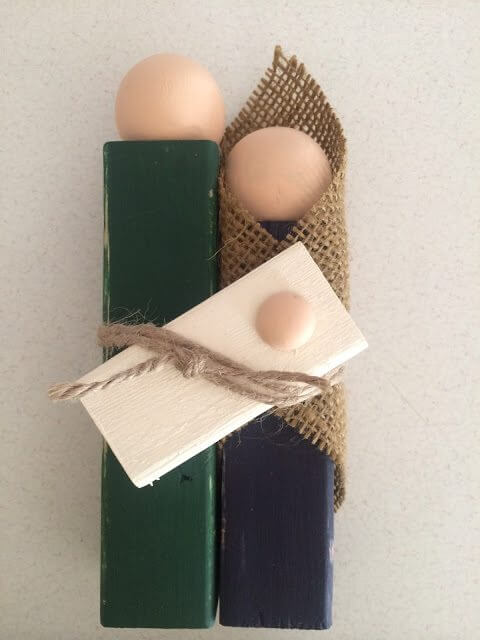
DIY Wooden Nativity
DIY Wooden Nativity! Here’s another simple but super cute Christmas craft for you! It’s very similar to the Snowmen one I posted yesterday. Either of these would make a super easy neighbor gift if you’re a quick crafter!
DIY Wooden Nativity
WHAT YOU NEED:
3 pieces of wood cut to varying lengths. (ours are 5″, 4″ and 2 1/2″, and the baby Jesus is a lot skinnier than Mary and Joseph)
Sandpaper
Blue, Green, White, and Nude Paint
Burlap
Paintbrushes
Wooden Spheres
String/Twine
Hot glue gun
INSTRUCTIONS:
1. Sand your wood pieces to your desired smoothness.
2. Paint each wood piece the desired color.
3. While the paint dries, cut your burlap and twine to the desired size.
4. Once the paint is dry, glue on the spheres and burlap.
6. Glue baby Jesus to Mary and Joseph and then wrap with the twine.


 Your Closest CHEERLEADERS!
 We are your big sisters , cheerleaders , and confidence boosters in building a happy home. We are the Lou Lou Girls!


This would be the perfect craft for a Super Saturday! Very pretty in its simplicity. Pinning!
That is beyond adorable!
so sweet!! already have some of my supplies!!
Oh these are so cute! And would be so easy to make. I think it would be cute to make a larger one for the porch and maybe use spindles. Thanks for sharing! Pinning!
That is such a great idea!!! Maybe I'll make a larger one next year too!
This is so cute and creative! I love Nativity scenes. Thanks for sharing at #OMHGWW!
Very cute and precious! And they look so easy to make.
So cute and adorable.
So sweet! I love this!
This is my favorite, and I like lots of your DIY Christmas crafts, this is rustic and simple, but magical. And I'm such a sucker for burlap! It had me at Hello! Pinning!
it is fantastic! Thank you for sharing at the Thursday Favorite Things blog hop. Watch for your feature tomorrow, xo