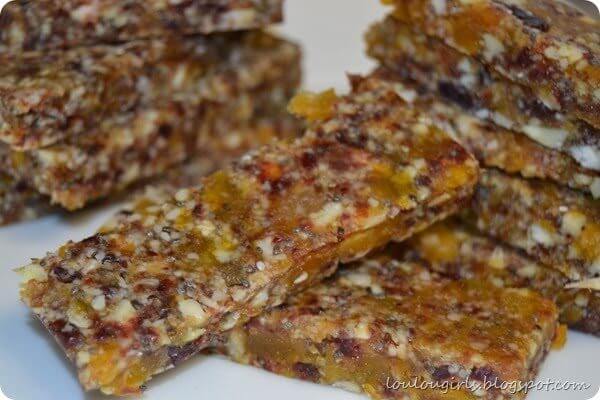
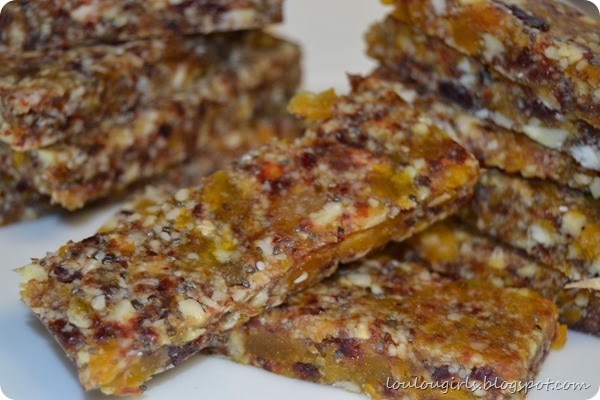
Homemade Lara Bars
Homemade Lara Bars (Healthy Fruit and Nut Bars)
I started a boot camp a couple of months ago, and it is totally kicking my trash! I don’t want all my hard work at the gym to be erased by bad food choices, so I am trying really hard to replace the unhealthy food my family loves with foods that are packed with nutrition and flavor.
These bars are perfect to replace any granola bar or a protein bar. They are all-natural, no sugar added, no-bake goodness. They are so easy that you’ll wonder why you’ve been buying that store-bought crap for so long.
Anytime I’m trying a new healthy recipe, I always let my kids help me out. I feel like they’ll enjoy pretty much anything they help me make. It always tastes better when they know what’s in it.
Gracie (my 4-year-old daughter) helped me make these and she kept asking for more when we were done. In fact, while I’m sitting here typing, she saw the picture and asked for one of ‘her’ treats.
I call these my Energy Bite Bars, here’s how you do it.
Homemade Lara Bars
Energy Bite Bars
20-25 pitted Medjool Dates (I buy mine at Costco)
2 cups of dried, un-sweeted fruit, any type. I used cherries and apricots for this recipe.
1 1/2 cups of nuts, I prefer cashews or almonds. I used almonds this time.
4 T. of Chia seeds. These little gems are packed with Omega-3, protein, antioxidants, and fiber. Plus they expand in your stomach, which helps you feel full longer! I got them at Costco.
Homemade Lara Bars
Directions:
Start by lining a small cookie sheet with wax paper. It should be double the length of your cookie sheet, so you can cover the tops of the bars with the wax paper too.
Next, use a food processer, I used my ninja, to pulse all of the ingredients together.
I put the ingredients in layers. For example. I start with half of my pitted dates, fruit, chia seeds, and nuts, and repeat the pattern. It mixes more thoroughly this way.
Keep pulsing until all the ingredients are sticking together. They should form a ball, or have a dough-like appearance. If the nuts aren’t sticking, then simply add more dates or dried fruit.
Dump the mixture onto your lined cookie sheet, cover with remaining wax paper, and use a rolling pin to flatten mixture until the sides are pressed up against the pan.
I like to let mine air dry a little before I cut them so they’re not so sticky. I remove the wax paper after the top has dried and then flip them and remove the wax paper on the bottom.
Cut with a pizza cutter, and store in a plastic bag until ready to eat.
The great thing about these is the versatility they have. You can use any kind of fruit and nut combination you want. We have tried coconut, pineapple, and cashew. Cherry and almond, and Fig, Cherry, and Cashew. Along with the cherry apricot almond I talked about earlier.
Give them a try, I bet you’ll be surprised at how easy they are to make if you’re still not convinced, go and read the ingredient label on the granola bars in your cupboard right now! They are most likely packed with sugar and weird chemicals you can’t pronounce…just sayin’!


 Your Closest CHEERLEADERS!
 We are your big sisters , cheerleaders , and confidence boosters in building a happy home. We are the Lou Lou Girls!


Sounds easy!
Sounds yummy! I love larabars. I keep thinking of getting a food processor…. this will have to go on my list of things to make when I finally do!
I bought a ninja at walmart for only $40 bucks and I've already used it a ton. It might be worth it:)
Looks good!! I have been wanting to try something like this for a while!
What a great recipe! I'd love for you to come and share it at Raw Foods Thursdays! Hope to see you there!
http://www.glutenfreecat.com/2014/03/raw-foods-thursdays-31314/
Heather
Thanks Heather, just linked up:)
Hi LouLou Girls,
I can't resist a sweet and healthy treat! With this delightful blend of healthy ingredients, you've elevated Lara's Bars to a higher level! I can't wait to try this recipe! I am so glad you shared this delicious recipe at the Plant-Based Potluck Party Blog Hop! I appreciate it!
What a wonderful healthy treat! This is being featured today; thanks so much for sharing at Mix it up Monday 🙂
http://www.flourmewithlove.com/2014/04/featuring-you.html
Pinned to try this weekend…they'll be finding their way into a few hockey bags!
Thanks! I hope you love them!
I love your idea of homemade Lara bars. These are just a great snack for a busy person for sure. Thank you for sharing with the Clever Chicks Blog Hop! I hope you’ll join us again next week!
Cheers,
Kathy Shea Mormino
The Chicken Chick
http://www.The-Chicken-Chick.com
YES! YES! and YES PLEASE! I've made similar recipes and am never disappointed. Thanks for sharing. Congrats on being featured at Mix it up Monday!
These look great! And much less expensive. Thanks!
Hi girls! Thank you so much for coming to Thriving on Thursday. Its so lovely to see you here. We don't have Lara Bars in Australia but this is certainly something we'd all love to eat. I'm featuring it this week. Thanks again for coming.
Anne @ Domesblissity
Your Homemade Lara Bars look delicious. Thank you so much for sharing with Full Plate Thursday and have a very special week.
Come Back Soon!
Miz Helen
Sounds so simple to make and delicious and healthy. A much better idea than many of the protein or snack bars on buy. Thanks for sharing on Real Food Fridays. Pinned and twitted.